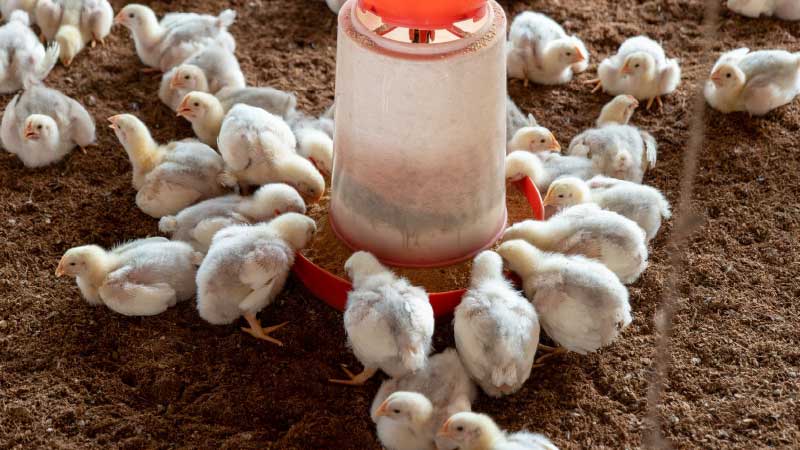
The first 7 days of a chick's life are the most critical period in poultry farming. 70% of all broiler mortality happens in the first week. Chicks that get off to a poor start — cold stress, dehydration, delayed first feed — never catch up. They grow slower, eat more feed per kg of gain, and have higher mortality throughout the cycle. Getting the first 7 days right is the difference between a profitable batch and a disaster [1][2].
Before the chicks arrive: prepare the brooder (Day -1)
- Clean and disinfect the brooder house 48 hours before arrival. Wash floor, walls, and equipment with detergent, then disinfect with iodine or chlorine solution. Let it dry completely.
- Lay fresh bedding. 5-10cm of dry wood shavings, rice husks, or sawdust. Never use damp or moldy bedding.
- Pre-heat the brooder 6-12 hours before chicks arrive. Target temperature: 32-35°C at chick level. Check with a thermometer placed 5cm above the floor.
- Fill waterers with clean, room-temperature water. Add electrolytes + glucose (1 teaspoon sugar per liter) for the first 24 hours — gives chicks immediate energy after the stress of transport [1].
- Fill feeders with starter feed (23% crude protein). Place feed on shallow trays or paper on the floor for the first 3 days so chicks can find it easily.
- Check the heat source. If using infrared lamps, position at 50cm above the floor. If gas brooder, set thermostat to 33°C.
Day 1: Arrival and placement
- Transport carefully. Chicks should be transported in ventilated boxes, not in the trunk of a hot car. Minimize transport time (under 6 hours ideal).
- Place chicks gently near the waterers first, then the feeders. Do NOT dump them — lower the box slowly and let chicks walk out.
- Observe for 30 minutes. Are the chicks spreading out evenly? Good. Are they huddling under the lamp? Too cold. Are they avoiding the lamp? Too hot. Adjust immediately.
- Count and record. Count the number of chicks placed. Note any dead-on-arrival (DOA). Acceptable DOA: less than 1% (e.g., max 5 dead out of 500).
- Check crop fill. 2 hours after placement, gently pick up 10 chicks and feel their crops (the pouch at the base of the neck). 95% should have full, soft crops — meaning they have found feed and water.
Days 2-3: Establishment
- Check temperature: 32-35°C maintained. Adjust heat lamp height if chicks are huddling or panting.
- Check water: waterers should never be empty. Clean and refill twice daily.
- Check feed: starter feed available at all times. Chicks should eat ~10-15g per day at this age.
- Check mortality: any dead chicks should be removed immediately. Record the number. Normal mortality: 0.5-1% in the first 3 days.
- Check litter: dry and loose. If wet under the waterers, add fresh bedding. Wet litter causes coccidiosis and respiratory problems.
Days 4-7: Growth phase begins
- Temperature: still 32-35°C (do NOT reduce yet — that starts in week 2).
- Feed: still starter feed (23% protein). Consumption increases to 15-25g per day.
- Remove floor trays/paper and transition to tube feeders (if not done already).
- Check crop fill daily: 100% of chicks should have full crops by day 4.
- Weigh 10 chicks on day 7. Target weight: 150-180g for Cobb 500, 140-170g for Ross 308. If under target, investigate: temperature, feed quality, water access, disease.
The 5 things that kill chicks in the first week
- Cold stress: #1 killer. Chicks that are cold stop eating and drinking, huddle, and smother each other. Solution: pre-heat properly, use a thermometer.
- Dehydration: Chicks that cannot find water die within 24-48 hours. Solution: place waterers at chick eye level, add electrolytes + glucose to the water for energy.
- Starvation: Chicks that cannot find feed waste away. Solution: use flat trays or paper on the floor for the first 3 days so feed is easy to find.
- Piling/smothering: Chicks pile on top of each other (usually from cold), and the ones at the bottom suffocate. Solution: correct temperature prevents piling.
- Yolk sac infection (omphalitis): Bacteria enter through the unhealed navel. Solution: dip the navel in iodine at placement, keep bedding dry and clean.
The day-7 checklist
By the end of day 7, you should have:
- ✅ Temperature stable at 32-35°C at chick level
- ✅ Chicks evenly distributed throughout the brooder
- ✅ 100% crop fill (every chick eating and drinking)
- ✅ Mortality under 2% (less than 10 dead out of 500)
- ✅ Day-7 weight: 150-180g (Cobb 500) / 140-170g (Ross 308)
- ✅ Dry, clean litter
- ✅ Starter feed being consumed at 15-25g per chick per day
If you hit all 7 of these targets, the remaining 4-5 weeks of the broiler cycle are straightforward — just manage temperature (reduce 3°C/week), feed (switch to grower at day 10), and biosecurity. The hard part is done.
Sources & References
- [1] Scribd: Brooder Preparation Guide for Chicks — preheating, bedding, feeding, drinking arrangements. Source: scribd.com
- [2] ResearchGate: Effect of Environmental Temperature During First Week — chicks at 20°C had lower weight gain than those at 25°C and 35°C. Source: researchgate.net
FarmWise tracks all of this automatically for your farm.
Start free